
Printing Photo with Trimming
You can edit photo displayed on the touch screen by trimming them and print.
-
Select
 Print on the HOME screen.
 -
Select
 From mem. card.
The memory card print menus are displayed.
-
Select
 Trimming print.
 -
Insert memory card into card slot.
The photo selection screen is displayed.
 Note
Note-
When you insert the memory card before you displays the memory card print menus, the photo selection screen in Select photo print is displayed.
To display the HOME screen, touch the HOME button.
-
If no printable photo data is saved on the memory card, Data of supported types are not saved. is displayed on the touch screen.
-
If more than 2,000 photo data are saved on the memory card, the photo data is split by group per 2,000 photos in reverse chronological order (date last modified) automatically. Check the message displayed on the touch screen and select OK.
-
-
Select a photo you want to print.
Note-
Other Options
-
-
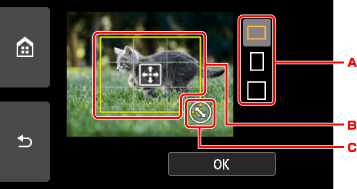
Trim print area.
-
Tap to switch the aspect ratio of the trimming frame.
-
Drag to position the trimming frame.
-
Drag to set the trimming frame size.
-
-
Specify settings as necessary.
Tap Copies to display the screen to specify the number of copies.
For the setting items other than Copies:
-
Touch Color button.
The printer starts printing.
![]() Note
Note
-
Touch the Stop button to cancel printing.
-
You can add the print job by tapping Print more while printing.
-
The trimming image cannot be newly saved on the memory card.
